Simplify backticks in macOS on a Scandinavian keyboard layout
Kalle Bornemark•22nd April 2019•☕3 min readAs a developer, I use backticks (`) frequently to highlight code in Markdown files. Once you get into the habit of using them, you start to realize that they’re available in a lot of places. Websites closely related to code, such as Github and BitBucket, often use Markdown, but so does Jira, Slack, and a bunch of other websites and applications. Heck, you can even use them in Facebook Messager:

The problem
Typing backticks in a Scandinavian keyboard layout is a real burden. This is much because of the button’s dead key behavior, where a single key press “waits” for a second character input to be potentially modified with an accent mark (ò, é, etc).
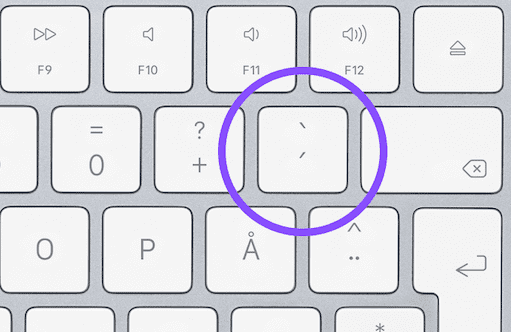
Note: This post specifically refers to the backtick key found on a Scandinavian keyboard layout, circled in the image above.
I’ve found that shift+`+space is probably the most consistent way of typing a single backtick without accidentally modifying any following characters. This works, I guess, but it’s not great, and considering this is something I’m doing many times every day, a better solution is desirable.
The solution
I realized that I virtually never use this key for anything other than backticks, so why even bother with the deadkey behavior at all?
Enter Ukelele. This neat little keyboard manager lets you remap any key to any output. Here’s a step by step guide on how to remove the backtick key’s deadkey behavior, resulting in a single backtick output on every keypress.
- Open up Ukelele. This will present you with a blank keyboard layout.
- Go to
File->New From Current Input Source. This will open up theKeyboard Layoutdialog, and a copy of your current layout (e.g.Swedish - Pro copy) will be added automatically. - Open the layout by double-clicking it in the list. You can now close the other blank layout without saving.
- From here, you can also close the
Keyboard Layoutsdialog. Doing this will prompt you to name and save the newly added layout (which I think is a little counter-intuitive). Before saving, make sureFile Formatis set toKeyboard Layout, not bundle. -
Next, move or copy your newly saved layout file to
/Library/Keyboard Layouts:cp /path/to/file/<your-layout>.keylayout /Library/Keyboard\ Layouts - Open up the MacOS keyboard settings (preferably typing ”keyboard” in Finder), and go to the
Input Sourcestab. - Click the little
+sign at the bottom left and search for your newly created keyboard layout to add it.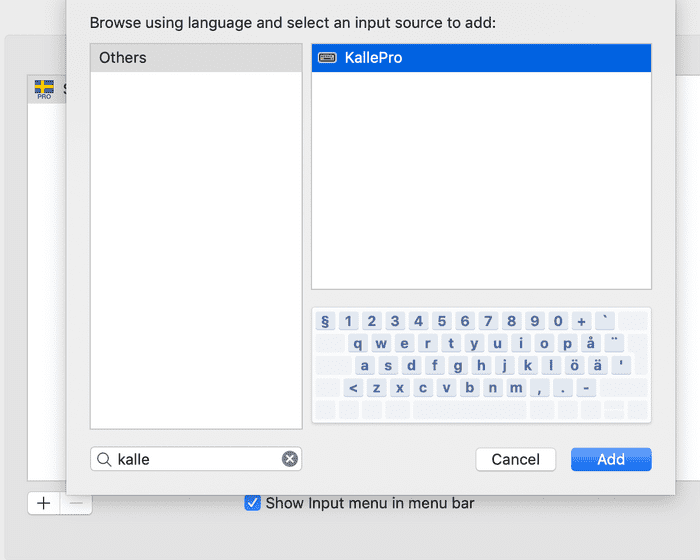
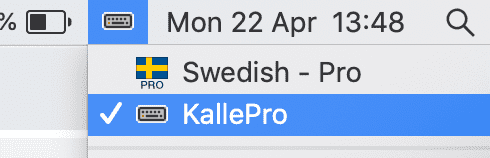
- Before closing the dialog, make sure the
Show input menu in menu barcheckbox is ticked. - From the menubar, switch the input source to your new keyboard layout.
That’s it!
Every keypress of the backtick button should now output a single backtick character, and you no longer have to worry about accidentally modifying the next character with an accent. 🥳
